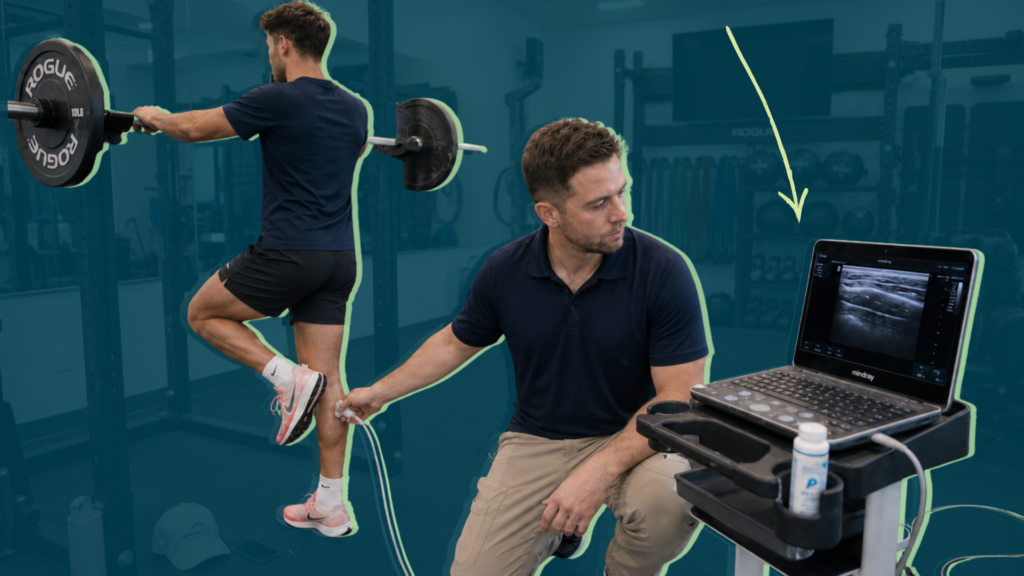
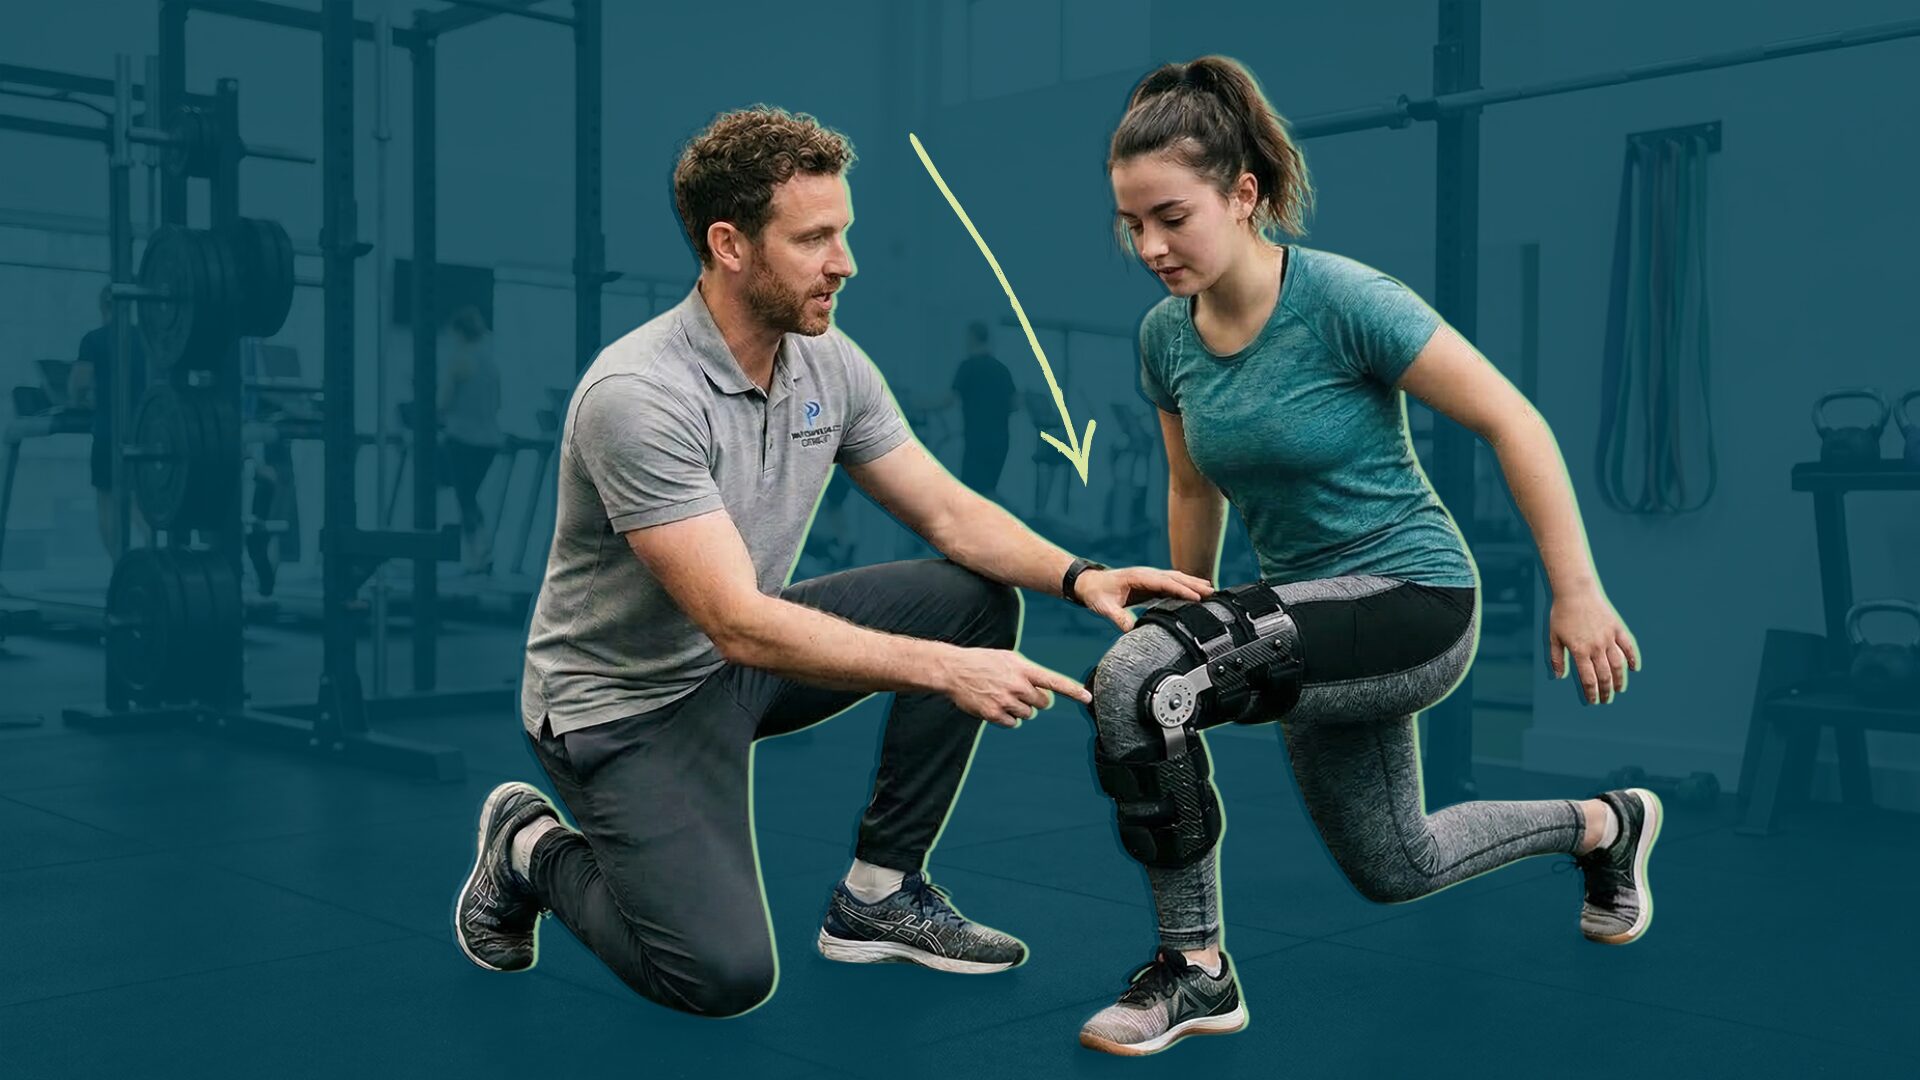
The medial collateral ligament is a broad, flat, membranous band located on the medial aspect of the knee joint. The MCL attaches proximally to the medial epicondyle of the femur and distally to the medial condyle and the body of the tibia.[1] The two functional layers—the superficial MCL (sMCL) and the deep MCL (dMCL), or posteromedial capsule—work together to control medial knee laxity.[2]
Overall, the MCL is the primary stabilizer of the medial side of the knee, limiting anteromedial rotation, valgus motion, and—partially—tibial internal rotation. The MCL’s contribution to stability varies with the degree of knee flexion.
The sMCL is the primary restraint to valgus stress at all tested flexion angles: 0°, 20°, 30°, 60°, 90°. It is also a secondary restraint to internal rotation at 0°, 30°, and 90° of flexion; and to external rotation at 90°.
The dMCL, as the name suggests, lies deep to the sMCL and is composed of two parts. Both connect the MCL to the medial meniscus and each contributes uniquely to knee stability.[2]
The meniscotibial component is a secondary stabilizer against valgus stress at 60° of flexion and is a secondary restraint to internal rotation at 0°, 30°, and 90°. The meniscofemoral component is a primary restraint to internal rotation at 20°, 60°, and 90°, and a secondary restraint to valgus stress at all flexion angles, as well as to external rotation at 30° and 90°.[2]
Preventing direct-contact MCL injuries remains challenging. However, by examining the kinematic alterations involving the trunk, hip, and ankle, we can develop rehabilitation programs aimed at improving the dynamic stability of these joints to reduce both the incidence and the severity of such injuries. During late-stage rehabilitation, in particular, sport-specific drills should systematically expose athletes to these mechanisms—planted-foot cutting, lateral trunk loading, and rapid deceleration—under controlled conditions before they encounter these forces in competition.
Assessing whether an athlete can control trunk position, maintain neutral foot alignment, and manage tibial internal rotation loads during multi-planar movements predicts readiness to return.
Tweet ThisDuring late-stage rehabilitation, in particular, sport-specific drills should systematically expose athletes to these mechanisms—planted-foot cutting, lateral trunk loading, and rapid deceleration—under controlled conditions.
@robertoricupito
MCL injury rates, mechanisms, and grading criteria
The MCL is one of the most frequently injured structures of the knee in both athletes and physically active individuals. Its prevalence ranges from 3 – 16.5%, but can rise to 41% when injuries to both the superficial (sMCL) and deep (dMCL) bundles are considered. [3,4]
The three main injury mechanisms are: a direct blow to the lateral side of the knee; a direct impact to the foot, creating a lever-like effect; and an indirect mechanism, such as during a sliding action.
The most common game situations associated with these injuries are being tackled or engaging in defensive pressing. Kinematically, the knee is typically flexed around 22° during direct-contact events, whereas flexion exceeds 100° in sliding situations. A valgus knee position is consistent across all patterns.
Indirect mechanisms involve additional movement patterns: trunk side-bending, hip abduction, and external tibial rotation. These all increase the load on both the superficial and deep fibers of the MCL. Another interesting observation is the contribution of the midfoot to injury mechanisms of knee valgus. In these cases, a pronated foot subsequently leads to knee external abduction and internal tibial rotation..[6]
The degree of medial joint opening during valgus stress testing in both partial flexion and full extension is the basis of classifying MCL injuries. This criterion reflects the level of medial knee laxity.[10]
Grade I injuries show intact ligament fibers with surrounding edema; grade II represents partial fiber disruption; and grade III corresponds to complete fiber rupture or avulsion.[10,11]
Grade I injuries were the most frequent clinical presentation, with an average of 10 days lost due to injury (although there was a large standard deviation of 32 days). The upper third of the ligament was the most common injury site (54%), with an average absence of 23 days. Injuries to the middle third accounted for another 31% of injuries, resulting in an average of 24 days lost. Lesions involving the lower third had a mean recovery time of 24 days. Across all injuries, the mean lay-off period was 24 days, with no significant differences in absence time across the different injury locations.[3]
The MCL demonstrates a strong healing capacity thanks to its extra-articular position and robust vascular supply, unlike the ACL.[12] As a result, isolated grade I and II MCL injuries are typically managed non-surgically through progressive physiotherapy and, when necessary, a stabilizing knee brace.
Grade III injuries, however, may require surgical repair or reconstruction.[12]
Rehabilitation from protection to performance
Most isolated MCL injuries are successfully managed conservatively. Surgical intervention is reserved for Grade III injuries with persistent valgus instability or MCL injuries combined with ACL insufficiency.[15,16]
Rehabilitation after MCL injury follows established phases, but progression depends entirely on individual healing response and functional milestones—not calendar days.
A valgus-based progression avoids movements in the frontal and transverse planes until valgus laxity improves from grade II to grade I. Likewise, the athlete will not restart high intensity and sport specific activities until valgus stress further decreases from grade I to a normal, stable response.
The four broad stages of rehabilitation are:
- high valgus protection and sagittal plane exercise only;
- high valgus protection and sport specific frontal plane and transversal plane exercise;
- sport-specific exercise with increase valgus stress;
- return to field rehab, which includes on-field rehab and return to training
Tweet ThisThe four broad stages of rehabilitation are: high valgus protection and sagittal plane exercise only; sport specific frontal plane and transversal plane exercises; sport-specific exercise with increased valgus stress; return to field rehab.
@robertoricupito
Guidelines for rehab progression
Pain and instability guide each session. Pain tolerance and perceived instability determine exercise selection and progression.
If pain increases beyond the athlete’s acceptable threshold or a sense of instability emerges during an exercise, regress the task to a more controllable variation. Regressions typically emphasize the sagittal plane, using a more internally rotated foot position, or increasing external focus on knee valgus control.
Each session follows a skill-based structure and has two core components. The first is specific loading exercises targeting patellar tendon strain, e.g., leg extension or leg press, performed isometrically or isotonically.
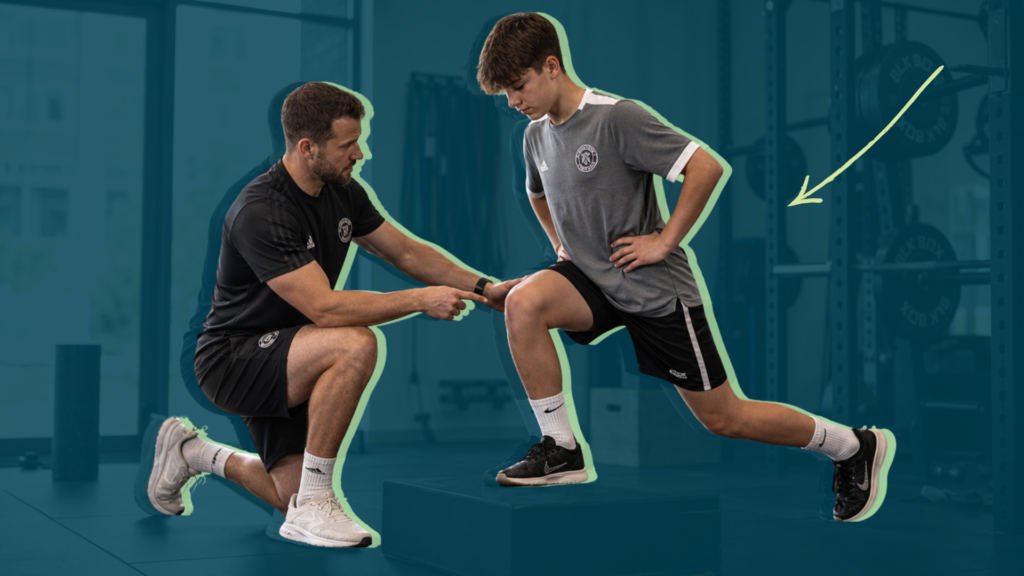
The second builds movement skills rather than isolated muscles. This part trains medial-side neuromuscular control during task-specific positions and muscle strength and power for that task.
An example is perturbations on the medial side in the body positions relevant to deceleration. Session A focuses on deceleration (anterior kinetic chain muscles), Session B on acceleration (posterior kinetic chain muscles), and Session C on pressing, tackling, or change of direction skills (lateral-medial muscles throughout the entire limb).
Every exercise uses both legs, with loads tailored for the injured and non-injured leg to avoid detraining.
Tweet ThisEach session has two core components. The first is specific loading exercises targeting patellar tendon strain, performed isometrically or isotonically. The second builds medial-side neuromuscular control during task-specific positions.
@robertoricupito
Progressing based on strength and neuromuscular control
Each strength & conditioning part of the daily session consists of four sets with progressively decreasing repetitions. The subsequent session picks up from the second set of the previous session, with the goal of increasing the external load by approximately 10%.
Example progression:
- Session 1: 15, 12, 10, 8
- Session 2: 12, 10, 8, 6
- Session 3: 10, 8, 6, 4
- Session 4: 8, 6, 4, 2
Throughout all sessions, the athlete maintains a consistent tempo of 2 seconds for the concentric phase and 2 seconds for the eccentric phase. The athlete must achieve 1-2 repetitions in reserve for all sets.
This pyramidal approach suits short MCL rehabilitation timelines by progressively exposing the athlete to higher loads, while not underestimating loading capacity.
Power-oriented work, rate of force development, and plyometric exercises begin in week 3, with the program maintaining similar volume but requiring maximal execution velocity. This phase includes isometric drops, catch and switch drills, ballistic movements, and plyometrics.
Force plates or systems like ADR jumping photocell allow us to monitor ground contact time (GCT) and height during tasks like drop jumps (DJ), aiming for symmetrical output between the limbs. These exercises enhance reactive strength in the frontal and transverse planes, progressively increasing stress on the medial knee side. Rest intervals between sets remain 2–3 minutes.
The athlete progresses on neuromuscular control and sport-specific exercises—from highly controlled valgus movements to tasks with higher valgus stress—only when weekly assessments show good tolerance to palpation, reduced valgus laxity (decreased medial joint opening between femur and tibia), and morphological MCL improvement (increased thickness and reduced fiber disorganization).
Tweet ThisPower-oriented work, rate of force development, and plyometric exercises begin in week 3, with the program maintaining volume but requiring maximal velocity. This phase includes drops, catch and switch drills, ballistic movements, and plyometrics.
@robertoricupito
Case report: Grade II MCL injury in elite female footballer
A 22-year-old central defender sustained a foot-to-foot collision during a defensive action, producing a lever-like mechanism. This resulted in a high grade II injury confirmed by MRI. She had previously suffered patellar tendinopathy and underwent surgery one year earlier to remove the completely degenerated central tendon portion.
The clinical challenges were to ensure proper MCL healing, prevent loss of patellar tendon adaptations, and maintain overall conditioning for return to play in about six weeks. Rehabilitation started four days post-injury, with three sessions focused on the lower limb and two sessions targeting the upper limb and cardiovascular system.
Phase 1: High valgus and external rotation protection
The initial phase prioritizes protecting the injured MCL from valgus stress and external tibial rotation, typically using a hinged knee brace during daily activities. Rehabilitation focuses on mobility and strengthening exercises strictly in the sagittal plane to avoid tensile stress on healing tissue, while addressing quadriceps inhibition.
The amount of weight the athlete is allowed to bear depends on injury severity. Grade I-II injuries permit immediate or early weight bearing; grade III often starts with 0-50% body weight with crutches, progressing as pain permits. The goal is to proceed to weight bearing as soon as possible (roughly four days post-injury) with a brace.
The athlete had full ROM from the beginning, with discomfort only in the upper MCL during maximal flexion. She progressed to full passive flexion slowly based on pain tolerance, with the tibia in internal rotation to avoid stress on healing tissue.
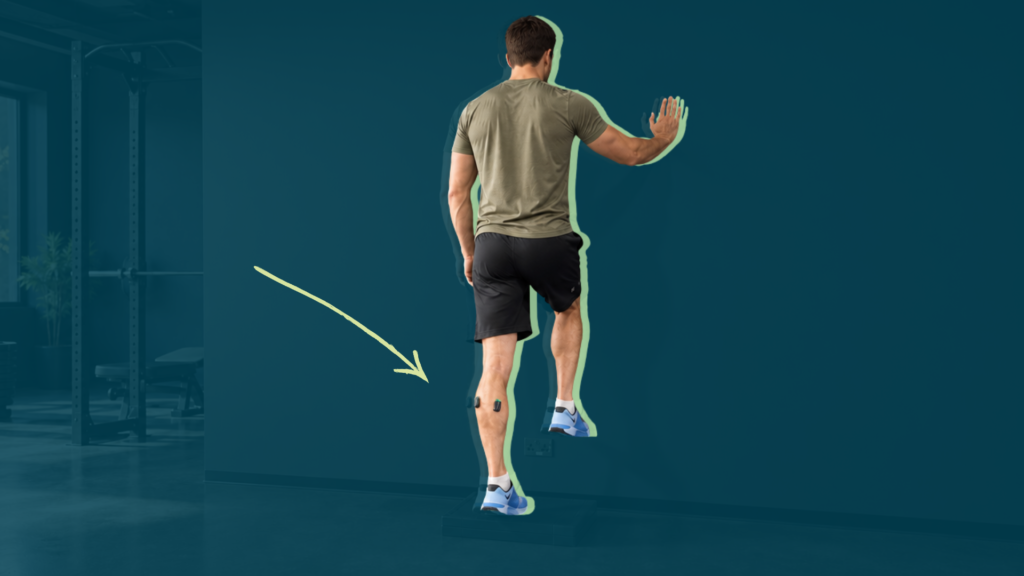
We put a strong focus on the medial stabilizers: hamstrings and adductors with the knee in full extension, and internal rotators with the knee flexed to 90°. Patellar tendon and strength exercises were part of every session to ensure quadriceps adaptations.
Knee valgus control exercises involved trunk motion in different planes (rotation, side-bending) or hip abduction, keeping the knee strictly aligned with the toes. Each phase focused on a particular sport skill. Session A was about decelerations. The first part worked on correct shin-trunk-body position and knee valgus control; and the second part targeted deceleration muscles like quadriceps, tibialis anterior, and abdominals. Session B addressed acceleration via posterior chain muscles and correct center of mass projection. Session C emphasized change of direction skills.
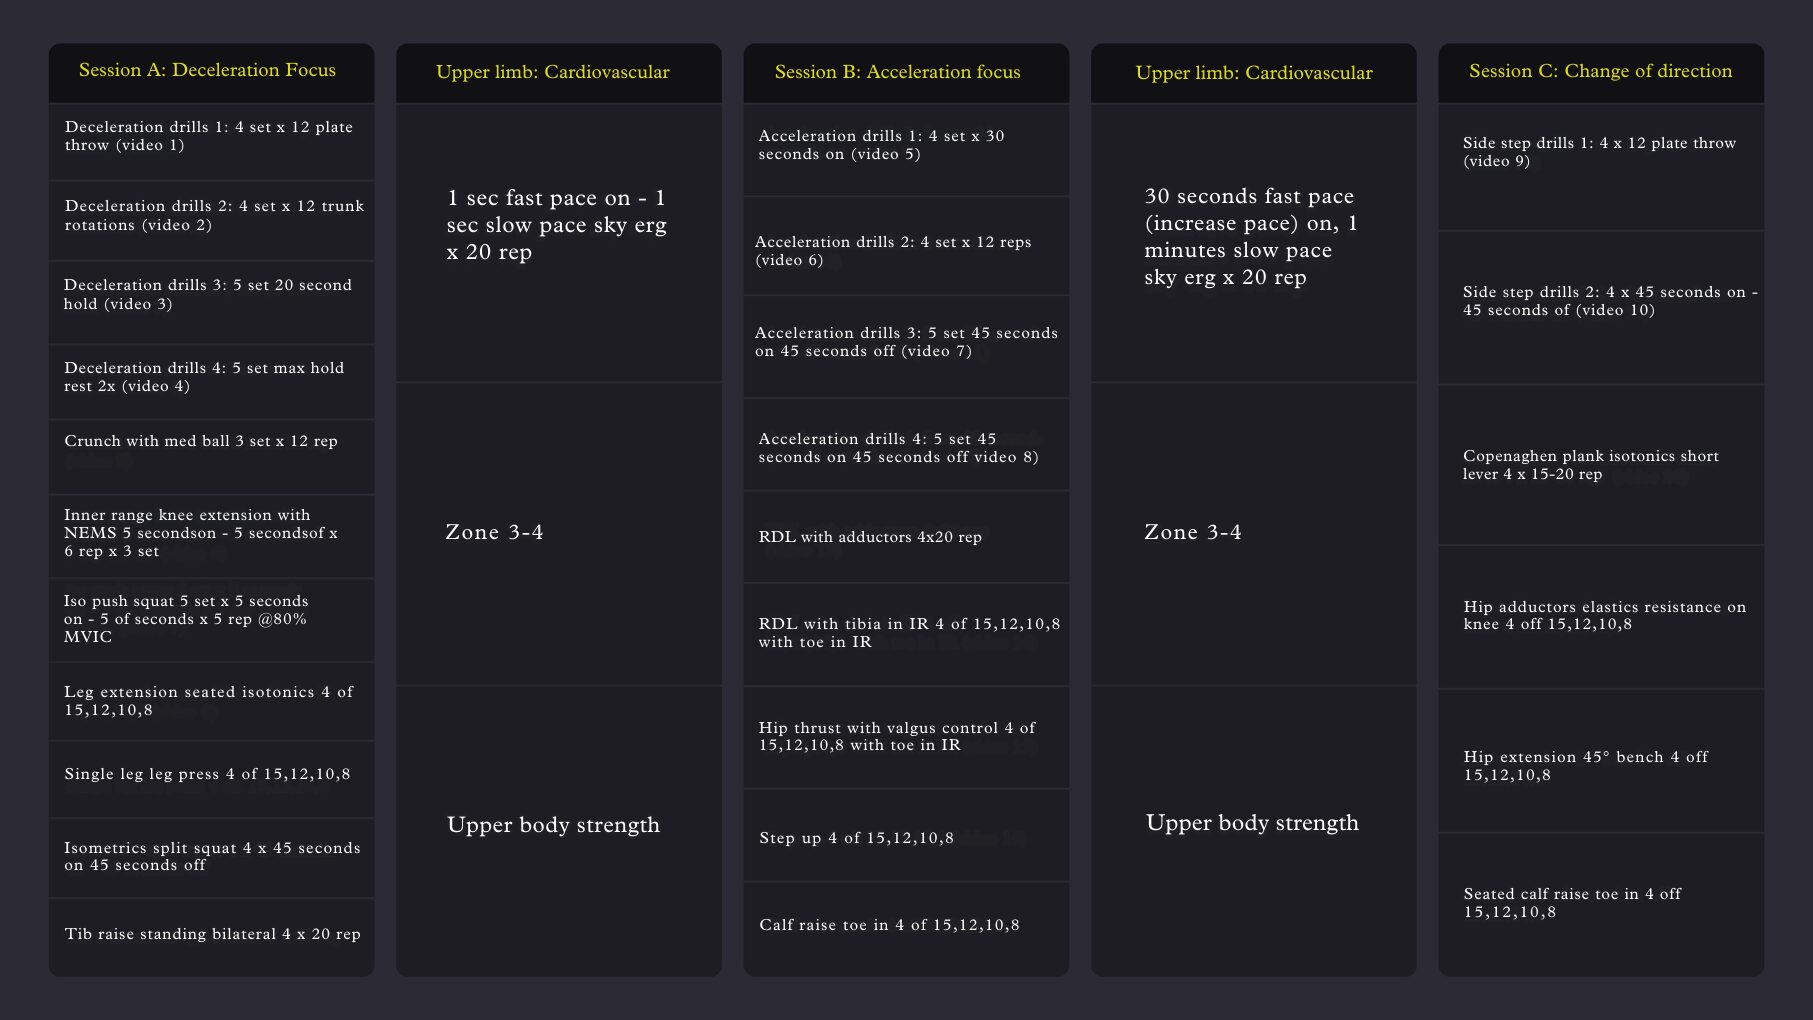
Click here for more deceleration focused exercises/drills from week 1 of rehabilitation
Click here for more acceleration focused exercises/drills from week 1 of rehabilitation
Phase 2: Valgus protection under increasing demands
The therapeutic exercise program expanded as valgus testing showed progressive reduction in medial joint gap and the athlete experienced less pain on palpation. Task complexity increased by challenging valgus control through combined hip, trunk, and foot movements in both frontal and transverse planes, using slow and fast reactive actions.
Once deep knee flexion became pain-free, more demanding conditioning restored aerobic and anaerobic capacity. This included twice-weekly high intensity interval training on a stationary assault bike (20 minutes of 15 seconds maximal effort, 1:45 recovery), plus gradual return to running progression.
The training structure remained similar to Phase 1, but now had running drills at the start of the session and explosive exercises (power development, controlled stretch-shortening cycle) in the strength & conditioning portion.
Running progressed linearly on field with sport-specific shoes via a nine-stage program that starts with simple drills and builds through jogging, running, high speed running, and then sprinting.
| Session A: Deceleration | Upper limb: Cardiovascular | Session B: Acceleration | Upper limb: Cardiovascular | Session C: Change of direction |
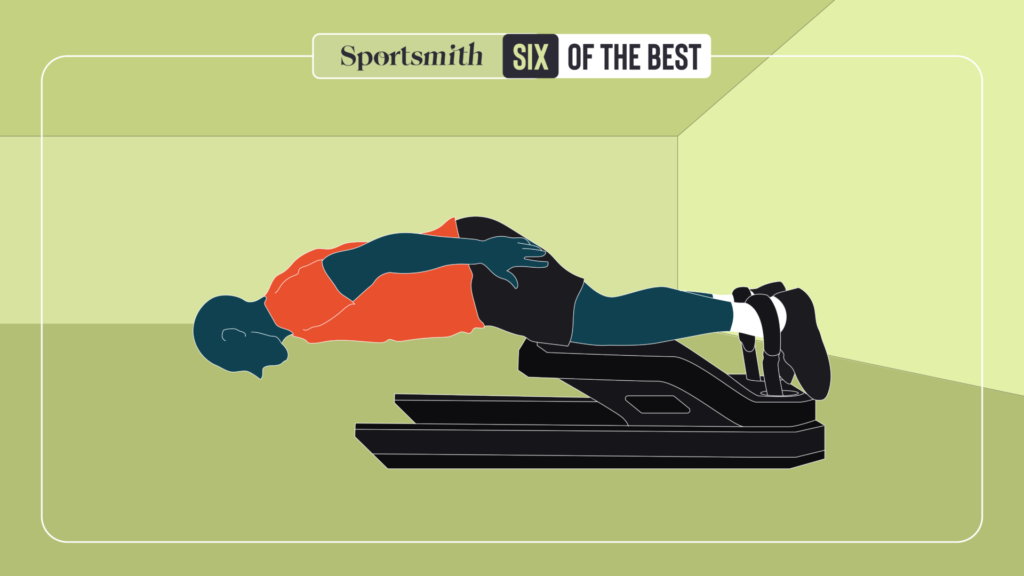
| Running drills: Toe taps 4 x 20 taps Bilateral pogo jump 4 x 20 Deceleration resisted 5 x 20 seconds on – 40 seconds off; GCT<200 ms Knee valgus control with hip ER trunk rotation and US feedback 3 set x 15 rep Knee valgus control with hip IR trunk rotation and US feedback 3 set x 15 rep (video 11) GHD sit up 3 x 6-8 rep | Running progression: Assault bike HIIT 20 seconds max effort – 1-40 seconds easy x 5 Rest 2’ Repeat x 3 set Zone 4-5 | Running drills: A skip 4 x 20 B skip 4 x 20 Acceleration drills 5×20 seconds on – 40 seconds off each side; GCT<200 ms (video 12) Knee valgus control march with perturbations US feedback 3 set x 15 rep (video 13) Dead bug with band 3×16 alternate (8 each leg) | Running progression: Assault bike extensive endurance 40’ zone 2-3 | COD drills 5×20 seconds on – 40 seconds each side off; GCT<200 ms (video 15) Lateral March wall with fit ball perturbations 5×20 seconds on 40 seconds off each side Lateral march wall with fit ball perturbations and unstable surface 5×20 seconds on – 40 seconds off each side (video 16) Running drills: High knees run Lateral lunge with elastic band 3×15 rep (video 17) Knee valgus control contralateral hip abductions and pertrurbations US feedback 3 set x 15 rep Pallof press split stance 3 x 8 each side |
| Iso push squat 5 set x 5 seconds on – 5 off seconds x 5 rep @80% MVIC Leg extension supine 4 off 12,10,8,6 Single leg press progression 4 off 12,10,8,6 Isotonics split squat 4 off 12,10,8,6 Single leg standing tibial raise 3×15 | RDL with tibia in IR 4 off 12,10,8,6 Hip thrust with valgus control 4 off 12,10,8,6 Nordic hamstrings relax contract 4 set x 6 rep (video 14) Calf raise toe in 4 off 12,10,8,6 | Copenhagen plank isotonics increase height 4 x 10-12 rep Hip adductors elastics resistance on knee progression 4 off 12,10,8,6 Single leg hip extension 45° 4 off 12,10,8,6 Seated calf raise 4 off 12,10,8,6 |
Click here for more exercise examples from week 2 of rehabilitation
Week 3: Dynamic strength and multiplanar control
From week 3 onward, the tissue showed progressive reduction in medial joint opening during valgus testing (assessed by ultrasound), along with decreased ligament thickness and pain on palpation.
Running progression advanced through all nine stages and extended to curved running. This phase added plyometric drills and stretch-shortening cycle activities across multiple planes, alongside greater emphasis on strength and power. Neuromuscular control tasks evolved to fully three-dimensional movements, intentionally challenging the knee toward valgus positions.
To bridge gym and on-field training, the athlete began neuromuscular acceleration / deceleration drills with the athletic trainer, guided by GPS data. Bike conditioning shifted to running-based programs led by the athletic coach.
Exercises fell into two categories:
- Tasks with high kinetic demands driving toward valgus stress, requiring maximal control via hip adductors and medial hamstrings for rapid stabilization.
- Lower amplitude oscillatory movements guiding the athlete into controlled valgus positions to progressively adapt ligamentous tissue.
EMG monitored muscle activation during tasks, adjusting foot-hip positions to maximize target muscle recruitment.
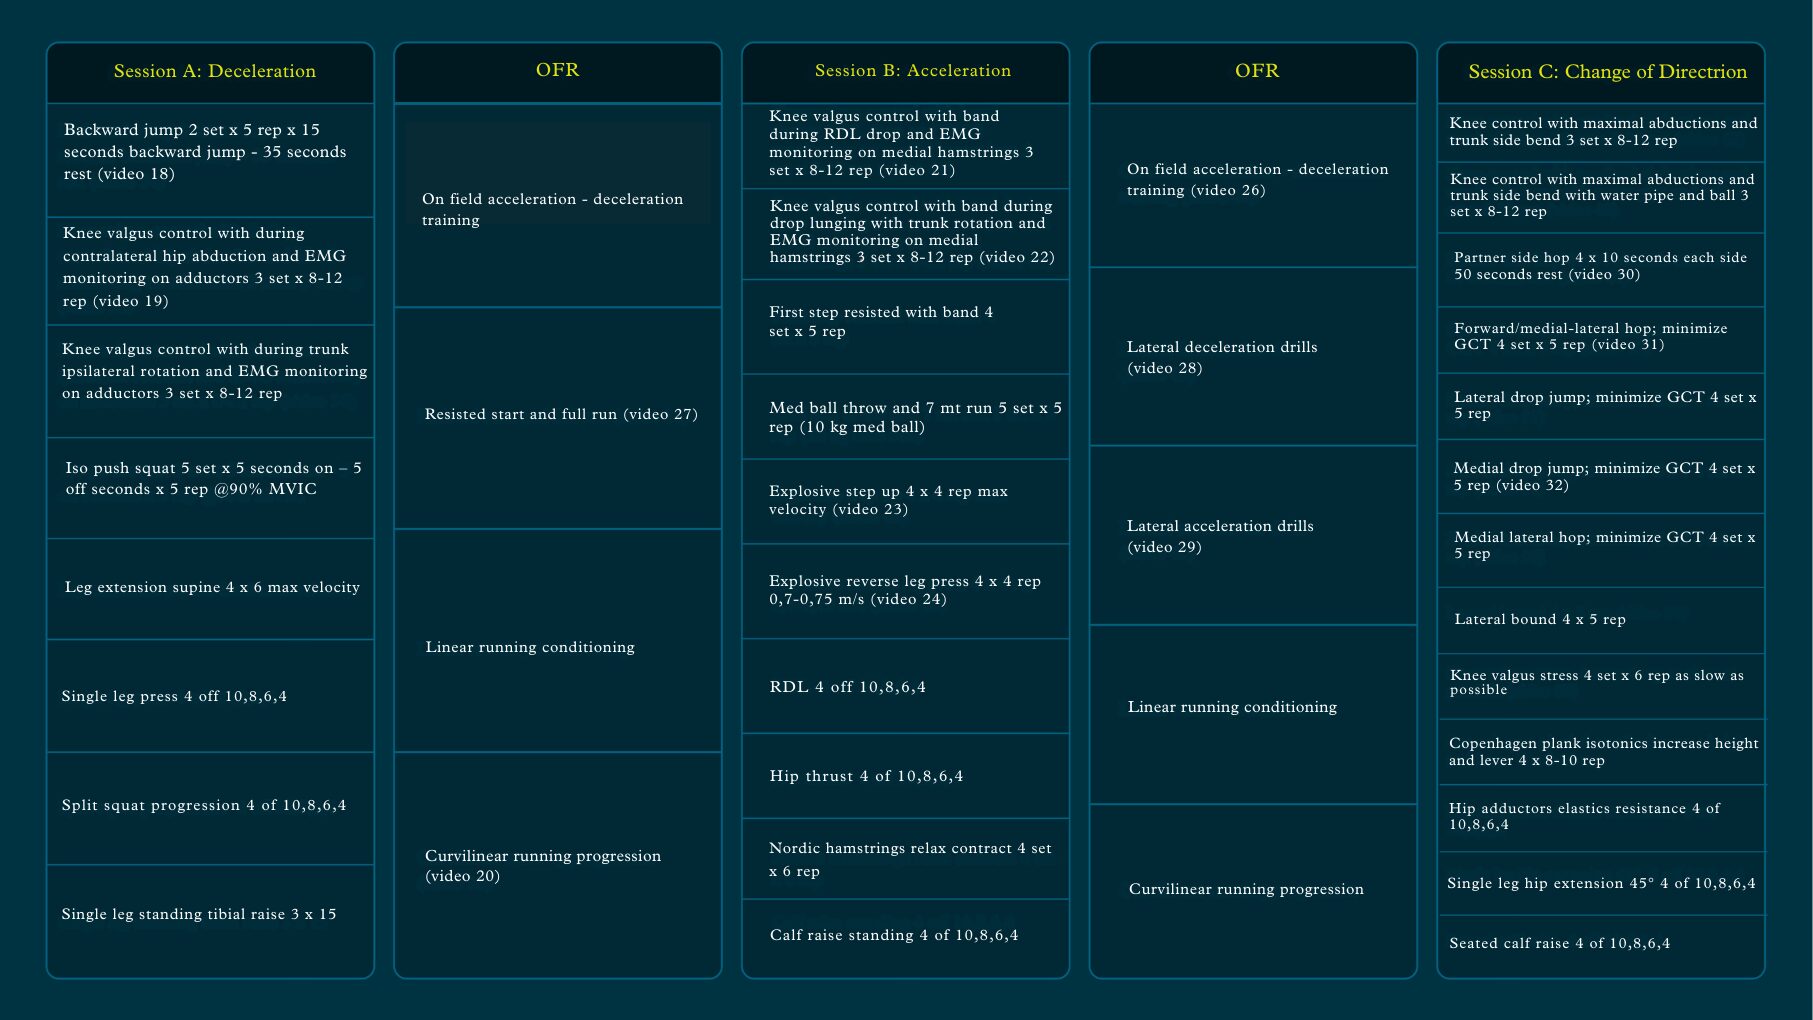
Click here for more gym-based exercise examples from week 3 of rehabilitation
Click here for more on-field/running drills from week 3 of rehabilitation
Click here for more plyometric exercises from week 3 of rehabilitation
Tweet ThisExercises fell into two categories: tasks with high kinetic demands driving toward valgus stress, requiring maximal control and lower amplitude oscillatory movements guiding the athlete into controlled valgus positions to progressively adapt ligamentous tissue.
@robertoricupito
Phase 4: Return to sport-specific movement and competition
Late-stage rehabilitation focuses on sport-specific demands and criterion-based readiness assessments. Gym-based training reduces from three to two sessions per week, maintaining strength and power work while emphasizing multidirectional plyometrics and both planned and reactive change of direction drills. On-field training continues four sessions per week.
On-field rehabilitation includes three components:
- change of direction drills and tackling-kicking impact
- technical work with ball and partner, starting with instep kicking and progressing to inside foot
- multidirectional running-based conditioning
The neuromuscular training (acceleration and deceleration) and running conditioning (high speed running, sprinting, and multidirectional speed) progressively increase in intensity and volume to match the pre-injury training levels before return to full training.
New or complex skills, e.g., adding opponents in defensive scenarios or modifying kicking technique, require graded progression with the physiotherapist in controlled environments. Overall progression builds around sport-specific patterns under controlled conditions; sport-specific patterns in reactive environments; gradual exposure to contact, medial-foot kicking, pressing, and tackling; structured, graduated return to participation.
| Session A Tackling and kicking impact focus | OFR | Session B: Change of direction | OFR | OFR |
| Knee perturbation with band in single leg squat 4 x 20 seconds – 40 seconds rest eye open/closed (video 33) Adductors drop with band eye closed 4 x 20 seconds on – 40 seconds off (video 34) Adductors drop eye closed elastic band on feet 4 x 20 seconds on – 40 seconds off Medial side kicking 4 x 4-6 max increase effort (video 35) | On field acceleration / deceleration training: Med ball throw and + COD Technical work with ball and partner: speed ladder and kick Head shot reactive drills Linear and curvilinear running progression | Frontal plane change of direction control with overhead elastic band 4 x 20 seconds on – 40 seconds off max effort (video 36) Frontal plane change of direction control with med ball fake throw and wall 4 x 20 seconds on – 40 seconds off (video 37) Frontal plane change of direction control with constrain overhead 4 x 8 rep (video 38) Single leg hop with water pipe and trunk contralateral rotation 3 x 8 hop (video 39) Single leg hop with water pipe and trunk ipsilateral rotation 3 x 8 hop | On field planned COD: Zig zag drills Backward shuffle Hurdle run with body rotation (video 40) Technical work with ball and partner: partner ball and cone Linear and curvilinear running progression | On field acceleration – deceleration training: Forward side hop Multidirectional run and brake (video 41) Technical work with ball and partner: reactive feet/head shot (video 42) Ball run 1 Ball run 2 Curvilinear + change of direction (video 43) |
| Iso push squat 5 set x 5 seconds on – 5 off seconds x 5 rep @90% MVIC Adductor catch with elastic band 4 x 8-10 rep (video 60) Single leg press 4 x 8,6,4,2 Nordic hamstrings relax contract 4 set x 6 rep Single leg hip extension 45° 4 x 8,6,4,2 Single leg standing tibia raise 3×15 Calf raise 4 x 8,6,4,2 | Leg extension supine 4 x 6 max velocity Reverse single leg leg press 4 x 4 velocity 0,7-0,75 m/s RDL 4 x 8,6,4,2 Hip thrust load 4 x 8,6,4,2 Copenhagen plank long lever 4 x 6-8 rep Seated calf raise 4 x 8,6,4,2 |
Click here to view more pertubation exercises from week 4 of rehabilitation
Click here to view more on-field exercises from week 4 of rehabilitation
| Session A: Change of direction | OFR | Session B COD focus | OFR | OFR |
| Partner Pallof press static 4 x 20 seconds on – 40 seconds off Partner Pallof static in split 4 x 20 seconds on – 40 seconds off Partner Pallof carioca step 4 x 20 seconds on – 40 seconds off (video 44) Partner Pallof lateral hop 4 x 20 seconds on – 40 seconds off (video 45) Partner perturbation jump 4 x 20 seconds on – 40 seconds off (video 46) | Multidirectional speed with ball perturbations (video 47) Multidirectional speed with ball perturbations 2 (video 48) Technical work with ball and partner: Resisted partner kick with medial side foot Ball control with Mannequin Multidirectional speed conditioning | Lateral shuffle elastic band 4 x 20 seconds on – 40 seconds off max effort (video 49) Lateral bound with trunk contralateral rotation 4 x 20 seconds on – 40 seconds off max effort Lateral bound with trunk contralateral rotation 4 x 20 seconds on – 40 seconds off max effort Run and brake with med ball 2 x 5 x 10 m run max effort (video 50) Reactive pivot 2 set 5 rep 100% max effort Reactive pivot and spin 2 set x 5 rep 100% max effort (video 51) Defensive agility 2 set x 5 rep | Team tic-tac-toe (video 52) Defensive situation with partner (video 53) Tackling situation 1 Tackling situation 2 (video 54) Tackling situation 3 Linear and curvilinear running conditioning | Training with team small side games 5 vs 5 Tactical work Multidirectional speed conditioning |
| Iso push squat 5 set x 5 seconds on – 5 off seconds x 5 rep @90% MVIC Single leg press 3 x 6,4,2 Nordic hamstrings relax contract 4 set x 5 rep Single leg hip extension 45° 3 x 6,4,2 Single leg standing tibial raise 3×15 Calf raise 3 x 6,4,2 | Leg extension supine 3 x 4 max velocity Reverse single leg leg press 3 x 4 velocity 0,7-0,75 m/s RDL 3 x 6,4,2 Copenhagen plank long lever 4 x 6-8 rep Seated calf raise 3 x 6,4,2 |
After five weeks, the athlete gradually returned to team training. Prior to match participation, a comprehensive assessment evaluated strength, jumping performance, sprint speed, frontal plane shuffling, pivoting change of direction, and ultrasound.
Targets included limb symmetry within 10%; sprint performance matched pre-injury benchmarks, while shuffling and pivoting used time-based measures.
After one week of unrestricted team training and one friendly match in which she played 45 minutes, the player completed 90 minutes in her first competitive game post-injury.
Click here to view more exercise examples from week 5 of rehabilitation
Click here for more partner or team based drills
Progress with purpose but not haste
Practitioners often rush athletes through rehabilitation phases based on calendar timelines rather than functional capacity. The phases outlined here provide a structure, but your assessment of each criterion determines progression. An athlete who enters Week 4 with persistent swelling or persistent medial side instability or quadriceps inhibition requires extended protection, progressing to more aggressive exercise. Conversely, an athlete with excellent compliance and a Grade II injury might achieve Phase 3 milestones by Week 3.
One key aspect of this program is gradual exposure to exercise. Before starting on-field movements, athletes must first achieve the same exercises with the physiotherapist in a more controlled environment before adding intensity and external variables.
Athletes must recover as quickly as possible while respecting the injured tissue. A main error is prolonging rest and avoiding “potentially dangerous” activities. Gradual exposure is key: once the patient is able and confident with a task, immediately progress to the next step.
Ensuring full communication with the athletic staff is fundamental. The athletic trainer progresses the work started by the physiotherapist, creating continuity between gym and field.
Tweet ThisAthletes must recover as quickly as possible while respecting the injured tissue. An error is prolonging rest and avoiding activities. Gradual exposure is key: once the patient is able and confident with a task, immediately progress to the next step.
@robertoricupito