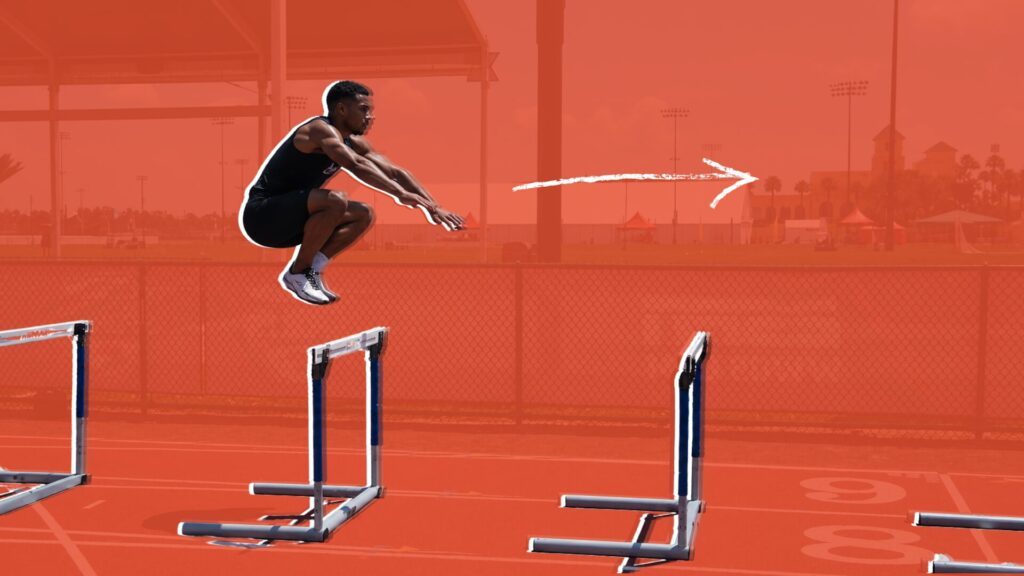
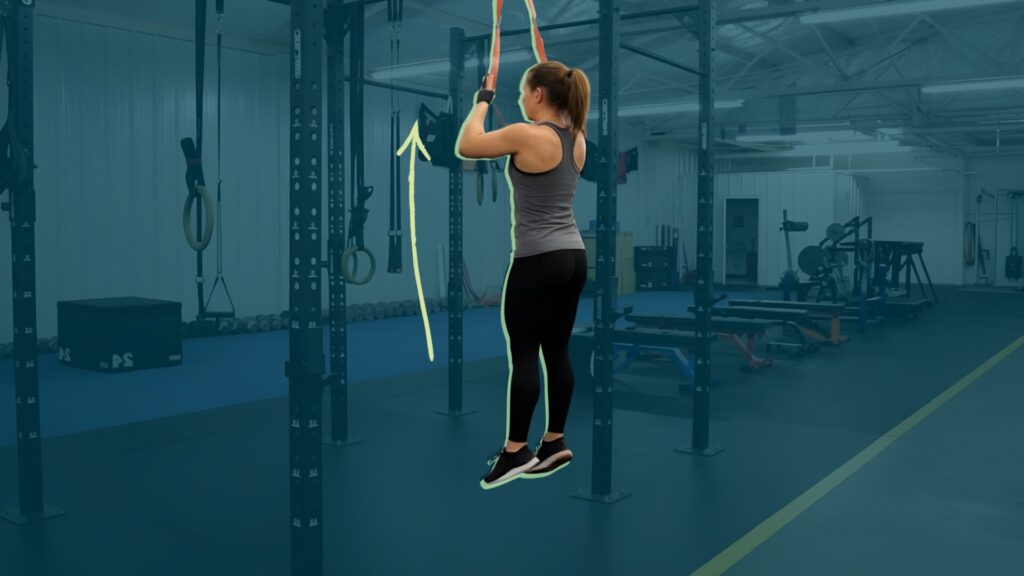
The Plyometric Continuum is an easy-to-follow, graded system of progression for all athletes to build competency steadily by exposing them to more and more complex jump and land variations, on their way to true plyometrics.
The common concept of a true plyometric is one with a low contact time, and true plyometrics are therefore highly demanding on tendinous structures. Consequently, a lot of coaches will use strength measures to define an athlete’s readiness for plyometric training. Although an underlying strength level is vital to get the most out of true plyometrics, a history of graded exposure to jumping and landing is the most effective way to qualify an athlete for high-end plyometric exposure.
All discussions here stem from my use of the Plyometric Continuum with many team sport athletes within a performance and rehab setting. The athlete’s training history is a large factor when evaluating the progressions and the time spent in specific phases. There will be occasions when you will move athletes along the continuum but, due to injury or maturation, you may need to regress them. It is near impossible to set concrete timelines in an overview article.
Coaches can initiate this model with athletes at any age or development stage, allowing a plyometric component to be in all programs you are delivering.
Coaches may need to hold youth athletes in a particular stage as they develop. Or you may inherit a more experienced athlete who can progress through a number of stages quite rapidly. Progression depends on the athlete’s ability to adapt and respond.
Tweet ThisAn underlying strength level is vital to get the most out of true plyometrics but a graded exposure to jumping and landing is the most effective way to qualify an athlete for high-end plyometric exposure
@lachlan_wilmot
For some context, I have worked with a field sport athlete who had two solid years of lifting experience, but almost no specific jump and landing training apart from his actual sport. I progressed him through the first three stages of the lower body continuum in approximately eight weeks of training. In contrast, working with a teenage athlete with almost zero exposure to lifting, I spent approximately five months layering a number of variations into his program to build a really solid foundation through the first three stages.
The lower body Plyometric Continuum

Within each of the five stages, the model has two phases that are progressions within that stage. This allows the coach to progress an athlete without necessarily rushing them out of a stage of the continuum.

The “Primary” and “Accessory” columns refer to the specific exercise selection for each phase. Primary exercises are those that the coach believes are critical for that phase and are key to the athlete’s progression to the next phase. The coach can turn to the Accessory exercises to lateralise specific variations or build a larger foundation in that phase, if needed.
The exercise selection above is only an example for the vertical vector. Similar progression tables can be produced for horizontal, lateral and rotational vectors. The versatility of this system allows any coach to populate these tables based on their facility access and coaching preferences.
Eccentric absorption stage
This stage is categorised by the athlete building an adaptation to landing forces and learning landing positions. As the old speed training adage goes, “Don’t learn to speed up if you don’t know how to slow down.” This rings true in jump and plyometric training, whereby building an athlete’s ability to land first will set the foundation for higher level jump training.
In particular, this stage will develop better capacity to tolerate the rigours of jump progressions.
Some of the key things we look for in a good landing are:
- Maintain centre of mass balance over base of support
- Actively preparing for ground contact through flexion movements at key lower body joints
- Good ability to stick and hold landing position if needed
- Minimal knee valgus
Tweet ThisThe key thing to look for in a good landing – centre of mass over base of support, actively preparing for ground contact, ability to stick and hold, minimal knee valgus
@lachlan_wilmot
There is no need to add concentric options here initially. Exercises like Tall-to-Short Landings (video 1) and Altitude Landings (video 2) work best to keep the athlete’s attention on just the eccentric portion of jump training. Conservatively-loaded options can also be good for lateralising variations within this phase. A great example of this is when we load a Tall-to-Short variation (video 3).
Video 1
Video 2
Video 3
Concentric development stage
The Concentric Development stage shifts the athlete’s focus from just absorbing landing forces to now expressing take-off forces. The unique aspect of this stage, however, is not the concentric force but the intention to still keep the concentric and eccentric portions somewhat separate. The aim is to employ exercise options that allow athletes to focus on concentric development without having to worry so much about the landing.
As an example, a Box Jump (video 4) fits perfectly into this phase. It allows the athlete to learn the aspect of take-off with a minimal effort required for landing, as the descent is negligible. This doesn’t mean that you stop prescribing key landing options for the Eccentric Development stage – they will just be set as individual exercises. The next stage of the continuum will integrate these elements.
Video 4
Jump integration stage
This stage shifts the athlete’s focus to combining concentric development and eccentric absorption within the same movement. These exercises will start to look more like traditional jump-and-land movements, allowing the landing portion to get more intense as the athlete’s concentric force production improves and they generate a greater change in height of their centre of mass.
Exercises like Counter Movement Jumps (video 5) and Single Hurdle Jumps (video 6) fit perfectly into this stage of development and act as the perfect steppingstone to the next stage. As with previous stages, you may still be utilising exercises from preceding stages to keep an extended focus on that area of the athlete’s development.
Video 5
Video 6
Continuous jumps stage
Entering this stage of the Plyometric Continuum will likely be the first exposure your athletes may have to “true plyometrics.” Introducing the concepts of contact time and flight time is critical.
By now, your athletes should have a strong foundation of what a good landing looks and feels like, along with the skill and strength to produce a decent amount of concentric force. This stage looks to challenge athletes with their next level of development, utilising tendon structures to a greater extent to create elastic contribution to their jumps.
Continuous Mini Hurdle Hops (video 7) and Continuous Broad Jumps (video 8) fit perfectly into this stage, building on previous exercises and creating an environment for the development of the stretch-shortening cycle. As with all progressions, this stage should be initiated with a combination of simple, in-place options, combined with low amplitude variations to build capacity prior to higher amplitude exercises with greater intensity.
Video 7
Video 8
Shock method
The final stage of the Plyometric Continuum is the introduction of the Shock Method. This method is well known for its effective adaptations on an athlete’s joint stiffness and, in turn, the ability to produce a significant flight time compared to their contact time. Shock Method options are characterised by aggressive contact, usually with the ground, by a free-falling body.
Key exercises include Drop (video 9) and Depth Jumps (video 10) or Hops. These often look less aggressive to the naked eye when compared to a Continuous Hurdle Jump or something similar. But I find it far easier for athletes to take up muscle slack and control landing and force transfer when they have taken off from a previous jump, compared to a Drop or Depth-style exercise where they have to take up muscle slack at a far greater rate in a shorter amount of time prior to contact.
Video 9
Video 10
The upper body Plyometric Continuum

The upper body continuum is split into two streams: a bent-arm stream and a stiff-arm stream. This categorises the exercises based on whether the elbow joint is involved or not.

Throwing sports could obviously benefit a lot from an Upper Body Plyometric Continuum. But the arm doesn’t act like the lower limb when it comes to high velocity movements, and throwers will have been throwing for a while by the time they decide to start training specifically in the gym. That advanced “throwing age” can skew their progression through these stages.
As a result, I don’t believe too much in upper body plyometric-like action for most sporting contexts. I spend most of my time developing stability and joint integrity, given my context of team-based field sports. There is, however, a lot of value in exposing the shoulder joint to varying and progressive velocity actions, particularly in the rehab space. These progressions will be most applicable to returning a shoulder or elbow to high velocity movements after some kind of inhibition.
The Upper Body Plyometric Continuum was primarily developed to build upper body velocity exposure through a systematic process when coming through the rehab timeline. A shoulder reconstruction is the primary use case, but it applies to numerous rehab timelines. Although the Upper Body Continuum is based on the same principles as the Lower Body Continuum, the stages are unique.
Concentric development stage
Unlike the Lower Body Continuum, the upper body starts with a focus on concentric development. This initial focus on concentric development is based off the typical aggravation that can come early in shoulder rehab from eccentric demands that often cause scapula retraction and posterior cuff pressure.
Basic concentric options at this stage would include exercises like Medicine Ball Chest Press (video 11), Shot Put (video 12), Ground Slam (video 13) and Scoop Toss variations. Starting slow and light is essential for the introduction of velocity movements during a rehab timeline. Progression can be a little quicker if the athlete is not rehabbing.
Video 11
Video 12
Video 13
Eccentric absorption stage
This next stage layers in some eccentric forces, starting to expose both the elbow and shoulder joints to eccentric loading, and building the absorption capacity of the surrounding musculature. This stage is not simply doing eccentric portions of typical strength lifts. It is about exposing the upper body to eccentric loading under some velocity.
Exercises like Kneeling Falls (video 14), Medicine Ball Drops (video 15) and Wall Catches (video 16) fit perfectly with this stage. They require no concentric recoil, and can be graded to control the intensity of eccentric velocity.
Video 14
Video 15
Video 16
Draw and release stage
The overarching theme of this stage is to introduce a controlled eccentric phase to prepare for concentric velocity. This can be done via several different exercise options, such as Bench Press, where the eccentric portion takes place at a controlled tempo, and then the coach encourages the athlete to perform the concentric action as quickly as possible.
Velocity can also be layered into the concentric phase via medicine balls. One example would be a Shot Put (video 17) variation. Start with the ball in two hands with arms extended, retract the ball at a controlled rate favouring one side, and then complete the concentric portion at speed as you would perform a typical shot put movement. You can also achieve a similar exposure pattern along the stiff-arm stream with Ball Releases in varying shoulder positions such as the I – Y – T angles (video 18 – Y-position, video 19 – I-position).
Video 17
Video 18
Video 19
Catch and release stage
This stage looks to expose the athlete to quick and explosive recoil times, in order to develop a more reactive response across both the shoulder and elbow joint.
Coaches can induce the higher velocity eccentric portion by, for example, throwing a light medicine ball for the athlete to catch overhead. The athlete will quickly decelerate the ball, then forcefully return the ball (Half Kneeling Overhead Medicine Ball Slam) : a very rapid and forceful eccentric loading pattern, followed by an explosive concentric action (video 20).
A Banded Bench Press (video 21) can also build the volume of a “catch and release” style movement pattern. By instructing the eccentric portion to be more of a drop and catch of the bar just prior to chest contact, the athlete can mimic catch velocities. The athlete should be instructed to then drive the bar back up as fast as possible during the concentric phase. The athlete will reset and repeat, always making sure during this stage that each rep is separated by a reset time period. Continuous actions occur in our next and final stage.
Video 20
Video 21
Repeated catch and release stage
The final stage of the Upper Body Plyometric Continuum combines all to drive adaptation. This stage uses exercises that have high velocity movements across both the eccentric and concentric phases, with continuous repetition. Continuing with the Banded Bench Press (video 22), we can progress to this final stage by simply removing the reset time and making it continuous for a targeted rep range.
Another key exercise group we can use in this stage are Tantrum variations. Both bent-arm (video 23) and stiff-arm (video 24) are very effective. By using banded resistance, we can execute the variations at very high speed and expose the athlete to very quick recoil times. Repeated throws are also very effective, typically using a light medicine ball on a wall or rebounder.
Video 22
Video 23
Video 24
Loading parameters across the Plyometric Continuum
Lower body Plyometric Continuum

When prescribing volumes for lower body plyometric options, there is very little research about the early stages we have referred to, so most of these loading ranges are based on my experience implementing the progression. Jump loads can be very dependent on the individual and their external loading, so there is a substantial range across each stage. But based on the continuum, we can make some educated guidelines to help coaches form a starting point to help guide volume prescriptions.
“Exposures per week” relates to physical sessions, so an exposure may have 2-4 exercises prescribed for that day. “Contacts per exposure” refers to the total number of contacts for the whole session, that is, from adding up all exercises.
For a young, inexperienced athlete in Phase 2 of Eccentric Absorption, who has likely only done one training block (4 weeks) of specific jump/land training, a session could look like this:
Pogo Jump (low amplitude) x 10 reps x 3 sets = 30 contacts
Tall-to-Short 1 Leg x 6 reps e/s x 3 sets = 18 contacts
Altitude Landing x 6 reps x 3 sets = 18 contacts
= 66 total contacts for this exposure
Generally, I will count a single leg contact on each leg as one total, not one contact for each leg. But as amplitudes increase, specifically around Phase 7, you will need to take into account the force absorption that the whole body undergoes. At low amplitudes, though, I find you can get away with counting a rep on each leg as a single contact.
Tweet ThisRigid systems can hinder creativity and unique application to athletes in different contexts. But sporadic responses to each athlete or situation breeds programs that lack direction and suck energy from the coach
@lachlan_wilmot
Upper body Plyometric Continuum

The upper body loading scheme is far more general. Again, the exercise selection can cover such a wide range, so the prescription is highly contextual. The same conceptual progressions as the lower body continuum can apply, but typically I will use a range of 30 – 50 total reps for upper body stages until “Repeated Catch and Release.” At this stage, due to the introduction of tantrums and lighter reps, I sometimes go as high as 70 total reps for a session.
Across the whole upper body continuum, I will work between 2 – 4 exposures per week, again all dependant on other training loads and the athlete’s rehab timeline. Volume is a very difficult parameter to give exact prescriptions for, so starting low and building gradually based on your athlete’s response is key.
Bringing the Plyometric Continuum into your context
Rigid systems can often hinder creativity and unique application to athletes in different contexts. On the other hand, off the cuff and sporadic responses to each athlete or situation breeds programs that lack direction and suck energy from the coach.
Those extremes inspired the Plyometric Continuum, a framework to help coaches focus their ideas and thoughts on plyometric training; structure that training in a way that is repeatable and progressive; while maintaining each coach’s freedom to develop their unique ideas within the system.